Artificial Grass Installation
Expert Preparation, Precision Laying, and Flawless Finishes for Your Easigrass Lawn
How To Install Artificial Grass
If you want to invest in artificial grass installation that will add value to your property and is built to last, Easigrass is the choice of quality. As experts with more than 30 years of installation experience, we know that creating the right foundations for laying artificial grass is crucial, as this will ensure correct levelling, placement and durability of your new Easigrass surface.
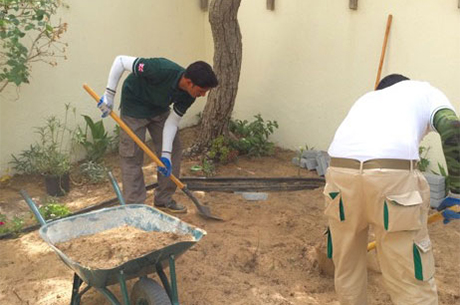
Step 1: Remove existing earth/dirt/sand down to the required depth.
Our irrigation experts will arrive at your property before the main installation team arrives. They will cap off any irrigation pipes and test the system to make sure that after we have left there are no issues with the irrigation leaking. The main team then arrives and we begin our first step major in the Easigrass installation process. This stage is the most time consuming part of the installation. We use a selection of tools to help us move as quickly but we also need to be as careful as possible as there are often irrigation pipes and electrical wires in and around lawns. We will dig down to the required depth, which is usually around 6cm. The reason we need to remove the existing grass is to make sure that there in no living vegetation left in the lawn once we have finished installing your new artificial grass lawn. Anything that was living needs to be removed so that there is no chance of it re-growing and ruining the artificial grass. Any weeds or grass roots need to be totally removed so that they don’t try and grow back through the grass. Normal sand and soil is also not suitable to have artificial grass installed on it either as it is not stable enough so it needs to be replaced with more solid base material which we will get onto later on.
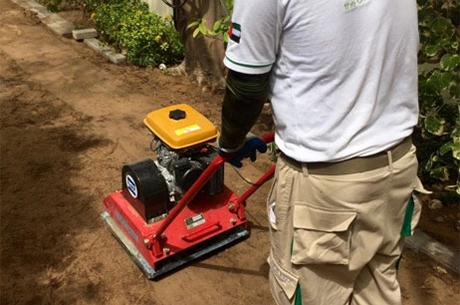
Step 2: Water and compact remaining earth/sand/soil.
Once we’ve removed all existing earth we are left with a rough bump and lumpy surface which needs to be flattened and compacted so that it is as hard as possible, almost like a foundation for the rest of the base. It will still be permeable but will now be hard, firm and flat, this give us a great start to the rest of the base system. We use the Easi-Wacker plate for this part of the base work.
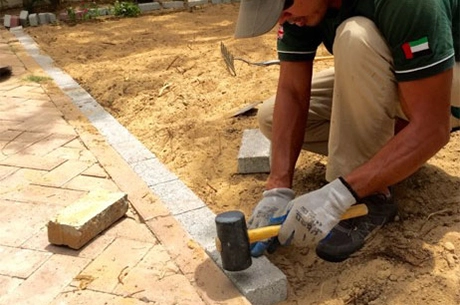
Step 3: Install interlock/brick edging
This is often the stage of the installation that confuses our clients as it looks as if we are adding an extra edge to the lawn. Well, actually we are, but it’s not an edge anyone will be able to see. These interlock bricks sit under the grass and give us something solid to glue to. Many companies use nails, spikes or simply leave the edges. We never use any metal anywhere near our grass; we have removed lots of old installations where the previous installers have used metal spikes and over time the metal has rusted and has become extremely dangerous, especially for anyone with bare feet, we don’t ever want to take this risk. Leaving the edges is also not an option; in Dubai and the Middle East temperatures can fluctuate so much during the day and night that the grass will try to expand and contact all day every day. In order to prevent the grass from rippling it needs to be secured down at the edges so that it can’t move. If it isn’t secured it will curl up an ripple within days.
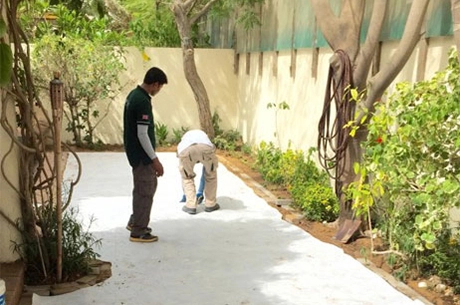
Step 4: Geo-textile layer
Once the earth is nicely compacted and the new edging is in we fit a heavy-duty geo-textile membrane to act as a weed barrier. This Geo-textile layer is like a thin paper sheet, it acts as a further barrier to prevent any organic matter that has managed to survive from growing up through the grass installation. As well as preventing any growth is also acts as a stabiliser separating the compacted earth and the aggregate base, which is the next part of the system.
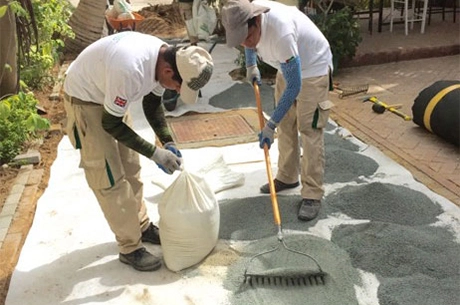
Step 5: Base material
We now introduce a crushed rock aggregate to form the new base.
This material is easily compactable and creates a solid, stable base, perfect for artificial grass. We spread it out over the geo-textile membrane and then carefully level it by hand making sure it is perfectly flat and even.
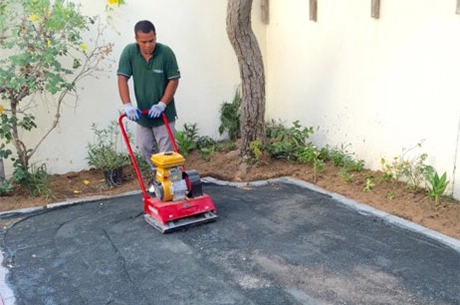
Step 6: Compact the new aggregate base.
Once the base has been levelled by hand and watered thoroughly we compacted it over and over again in order to get the perfect finish but once it has been given the correct amount of attention it will be incredibly even and feel extremely solid whilst still remaining porous.
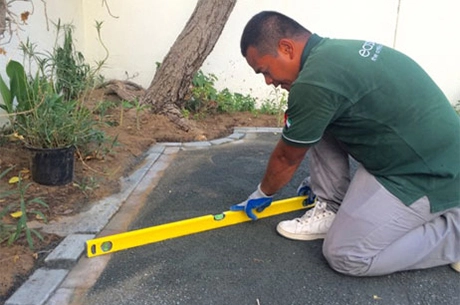
Step 7: Check the new base levels are perfect
We check the base levels with a straight edge to make sure that when the artificial grass is being installed it is going down on a perfectly flat and smooth surface.
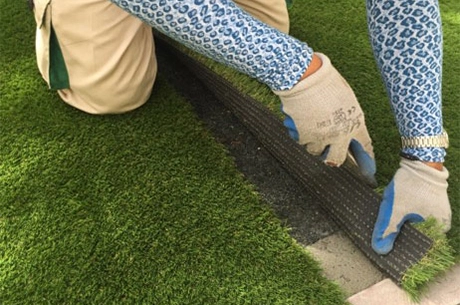
Step 8: Supply and fit your chosen Easigrass™.
Now comes the fun part, your Easigrass artificial grass is ready to go down. First we work out the best direction for the pile of the grass to face. All fake grass products will tend to lean a fraction in one direction or the other. Some products more than others and some you can hardly even tell but all products will have a direction. We assess the area where the grass is going and where there will be the least seams possible combined with the best viewing angle we make our decision on how to to install the grass. Once the uncut rolls are in place we will then firstly rough-cut then grass so it’s easier to work with. We then trim the grass to the perfect size and make sure it’s a great fit for the new base and edging.
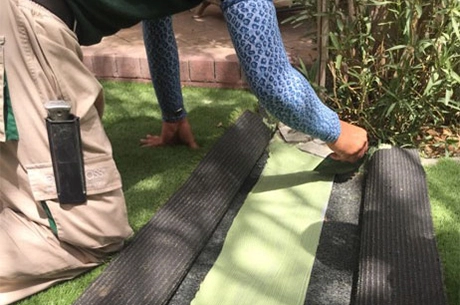
Step 9: Gluing and preparing the seams
We open up the prepared seams of the grass so that we can insert our glueing tape easily. We then apply glue to the specialist seaming tape using our in-house deigned gluing machine. The glued tape is stretched out along the seam and then the seams are closed onto the tape. This gives a perfect fit and leaves the seams virtually invisible.
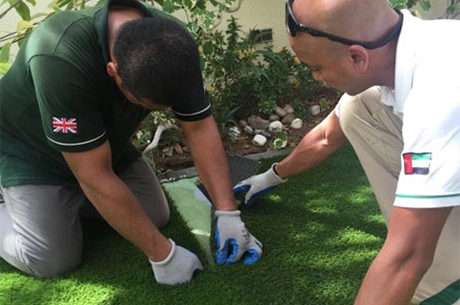
Step 10: Close the seams
This is where experience and product knowledge come into play. When the seam is closed it should be about 97% invisible, sometimes under the correct circumstances the seam can totally disappear but generally speaking if you know where to look you will be able to detect it ever so slightly. The technician will look for areas along the seam that are more visible than others and trim the grass accordingly. Only our most experiences installers work on the seams.
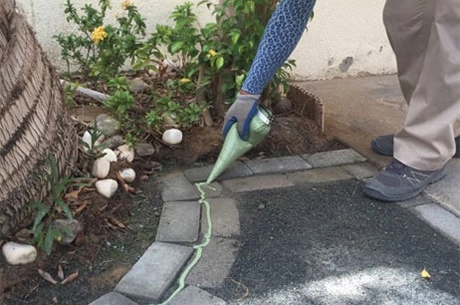
Step 11: Apply artificial grass glue to all edges
Once all the seams are closed and have been meticulously checked we then move on to gluing the edges of the system to make sure there is no movement once the installation is finished. Once the glue is in place on the edges we attach the grass and apply pressure in order to create a very strong bond.
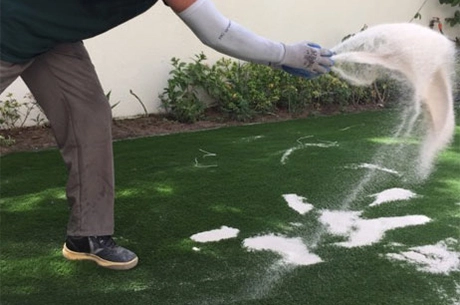
Step 12: Apply the sand Infill
Once the grass is cut into place and all the edges and seams are glued it’s time to get the sand on as quickly as possible. The sand does three important things. It weighs the whole system down to stop it moving whether from shrinkage, wind or heavy use. The sand infill also helps to keep the fibres standing upright for as long as possible and also protects the backing of the artificial grass carpet that could be pierced or damaged. The sand we use though isn’t beach sand or dune sand it’s a special kind of sand called silica sand that is actually the broken down mineral, quartz. It’s the same white sand you see in bunkers on golf courses. It’s a very clean and very round sand so it protects the artificial grass blades and the base of the grass. Once the sand has been applied to the grass it needs to be massaged into the fibres so that it sinks right to the bottom of the grass and sits on the backing material. We do this using a blower and a power brush to evenly distribute the silica sand throughout the installation. Once we’ve been over the installation with the blower and the brush the sand is totally invisible but will remain there throughout the life of the grass protecting it.
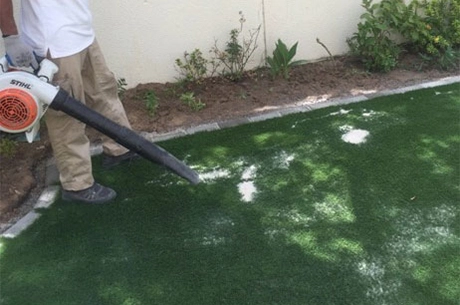
Step 13: Silica sand levelling
Once the silica sand is in the grass we find any areas that feel slightly uneven and Using a blower we evenly distribute the sand throughout the installation so that the grass feels nice and even underfoot.
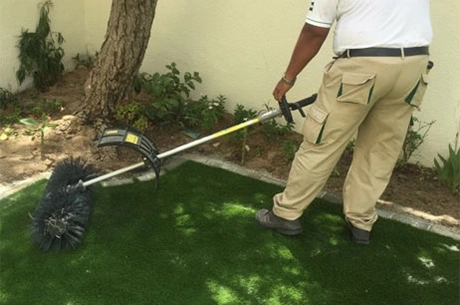
Step 14: Clean up
Lastly we give the installation a quick spray with water and a final brush with the power broom in the opposite direction to the pile. Any dust that has settled on the grass fibres is washed away and the lawn glistens in the sunlight ready for handover.
Award-winning supplier and installer
100% British Designed Artificial Grass
10 Year Guarantee
Highest quality product & service
We never compromise on quality
Ideal for pets and children
Easigrass Supplies & Installs
Artificial Grass Products in Dubai & Abu Dhabi

